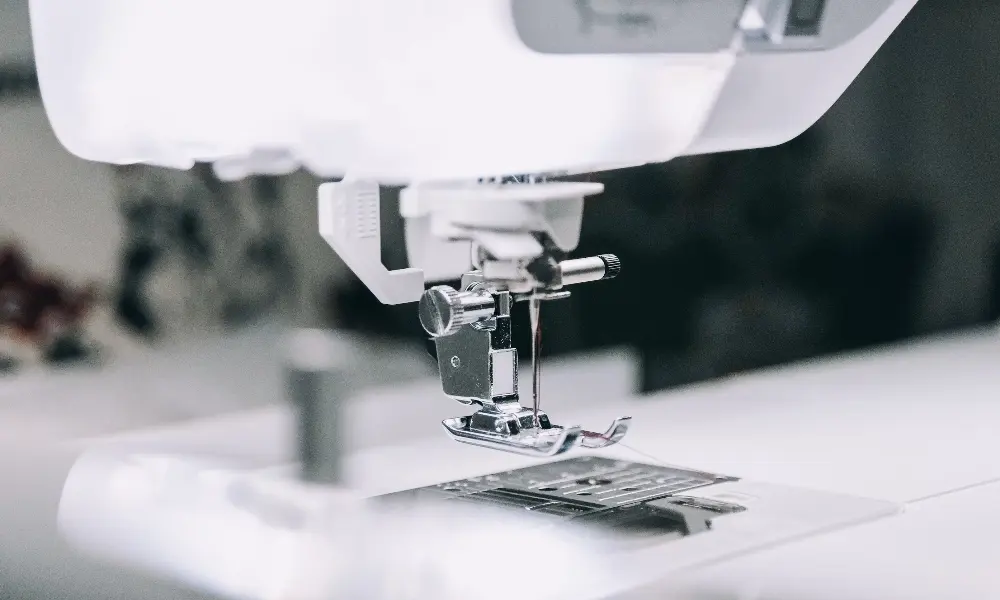
Sewing delicate silk successfully is less about forcing a standard lockstitch machine to behave and more about reducing every contact point that can stretch, snag, or bruise the fabric. Most silk defects—puckered seams, needle holes, wavy edges, and skipped stitches—come from three sources: the wrong needle profile, excessive thread tension, and feed parts that are too coarse for the material. The adjustments are small, but they must be made as a system.
This guide covers machine selection, needle and thread pairing, tension calibration, seam construction, and practical handling for woven silk, chiffon, georgette, habotai, and lightweight linings. It is written for production managers and sewing supervisors who need consistent results across hundreds of pieces, not just a single sample.
Why Silk Needs a Different Setup
Silk is strong for its weight, but it has low elongation and a very smooth surface. It does not hide feed marks or tension imbalance the way heavier woven fabrics do. A stitch that looks acceptable on cotton twill may appear on silk as a row of tight perforations or a puckered seam line [1]. Seam construction also changes the result: a French seam, bound seam, or plain seam places different amounts of thread and fabric inside the seam allowance and influences how the finished seam lies [2].
Before adjusting anything on the machine, set up the sewing point properly:
- Use a fine-tooth feed dog and a single-hole straight stitch plate.
- Reduce upper thread tension below the normal dry-cotton setting.
- Use a sharp needle no larger than size 70/10.
- Lower presser foot pressure until the top layer no longer shifts.
- Test on a double-layer scrap cut in the same grain direction as production.
Machine Type and Feed System Selection
Start with a single-needle lockstitch machine rather than a multi-needle or zigzag unit. Lockstitch class 301 is the reference stitch for most woven silk seams because it produces a balanced, low-bulk seam and can be sewn slowly without needle heat [1].
For straight seams on silk charmeuse or lining, a drop-feed lockstitch with a fine-pitch feed dog works when foot pressure is lowered correctly. If the fabric is extremely slippery or cut on the bias, a needle-feed or compound-feed lockstitch helps prevent ply shift without stretching the top layer. This is the main upgrade path when standard drop feed continues to create feed marks.
Cut edges should be finished on an overlock machine with a narrow 3-thread setting and differential feed. Differential feed is especially important on georgette and lightweight chiffon, which can ripple if the front and rear feed dogs move at the same rate. A slight stretching or gathering adjustment often removes wavy edges before tension changes are attempted [2].
If you are uncertain whether the feed system is causing a defect, send a 30-second video of the machine sewing silk plus a close photo of the needle plate to sales@tzpioneer.com. Before changing any tension setting, we usually identify whether the throat plate, feed dog, or presser foot is the real problem.
Needle, Thread, and Tension Balance
For woven silk, use a sharp set-cloth point needle in size 65/9 or 70/10. A ballpoint needle is intended for knits and will skip or damage tightly woven silk. A larger needle creates visible holes even when stitch quality looks acceptable; once the fabric is pierced too heavily, the defect cannot be pressed out.
Thread selection works with the needle, not independently. A fine continuous-filament polyester or mercerized cotton thread seats into the seam better than a thick twisted thread. When the thread is too heavy, the upper tension must be increased to form the stitch, and that extra tension pulls the seam into a permanent pucker.
Tension should be set as a sequence: stitch length first, then presser foot pressure, then bobbin tension, and finally upper tension. The goal is a needle thread and bobbin thread meeting in the middle of the fabric with no visible indentation along the stitch line. Reduce both upper and bobbin tension slightly from normal settings, then test on scrap. If the seam still puckers, do not keep lowering only the upper tension; recheck whether the needle and thread size are correctly paired first.
Before you lock tension settings, make sure the cutting and decorative workflows upstream are part of the same defect analysis. <Key Differences Between Sewing Embroidery Cutting Machines> covers how separating cutting and embroidery steps prevents panel distortion before sewing begins.
Stitch Length, Foot Pressure, and Speed
For fragile silk, a stitch length in the 1.5–2.5 mm range is a practical starting point. Shorter stitches add thread and stiffness to the seam, while longer stitches can allow the fabric to slip and create an unstable seam line. Use a straight-stitch plate with a small needle hole; a wide-slot plate lets silk push down around the needle and causes skipped stitches.
Presser foot pressure should be just high enough to control the fabric without leaving a mark. A Teflon foot or roller foot is useful on satin-faced silk and other shiny surfaces. Some operators also reduce feed dog height slightly below the standard setting so the teeth do not imprint the underside of the fabric.
Speed control is a quality tool, not a production penalty. Sewing silk at a moderate speed allows the operator to guide the fabric without pulling, which is the most common cause of seam drift and uneven seam allowance. When a seam must be tested for strength, have the seam specimen evaluated under a controlled method such as ASTM D1683 so that stitch type, thread choice, and seam construction are validated together [3].
Common Defects and First Corrections
| Defect | Primary cause | First correction |
|---|---|---|
| Puckered seams | Upper tension too high | Lower upper tension; verify needle/thread pairing |
| Visible needle holes | Needle too large or damaged point | Change to a sharp 65/9 or 70/10 needle |
| Skipped stitches | Blunt or ballpoint needle | Use a sharp set-cloth point needle |
| Wavy seam edges | Excess foot pressure or feed stretch | Reduce foot pressure; adjust differential feed |
| Fabric creep | Coarse feed dog or wide-slot plate | Fit fine-tooth feed dog and single-hole plate |
| Snags or thread pulls | Burr on throat plate or foot | Polish or replace the contact part |
When a silk line runs beside heavier fabrics, many operators tune one machine too aggressively instead of separating the line by machine type. A lockstitch set up for denim cannot be corrected into a silk machine with tension changes alone; the throat plate, feed dog, presser foot, and needle system must match the lighter material.
When silk is one part of a broader product mix, matching the whole line matters more than tuning a single machine. <Your One Stop Sewing Equipment Procurement Platform> covers the full machine range for a mixed-fabric factory.
Specifying Silk Sewing Machines: What to Send for a Quote
The fastest way to get a workable silk machine specification is to send the following details together:
- Fabric type and weight, such as 8 mm silk charmeuse or 12 mm georgette.
- Seam types and stitch class required, including edge finishes.
- Panel size and number of plies to be sewn.
- Current machine model, needle size, and defect photos.
- Required stitch density or stitches per inch.
- Local voltage, air supply, and monthly output target.
From those details, we can recommend a lockstitch, overlock, or compound-feed package without pushing unnecessary automation. Email sales@tzpioneer.com or call +86-18069305333 for a specification review.
Frequently Asked Questions
What is the best sewing machine for silk?
A single-needle lockstitch machine with a fine-tooth feed dog, single-hole throat plate, and reduced foot pressure is the most practical starting point. For slippery or bias-cut silk, a needle-feed or compound-feed lockstitch gives better control.
What size needle should I use for delicate silk?
Use a sharp set-cloth point needle in size 65/9 or 70/10. Do not use a ballpoint needle on woven silk, because it can cause skipped stitches and fiber damage.
How do I stop silk from puckering?
Reduce upper and bobbin tension slightly, use a fine needle and fine thread, lower presser foot pressure, and test on scrap. If puckering continues, inspect the throat plate and feed dog for burrs or coarse tooth profiles.
Can I use an overlock machine on silk edges?
Yes. A narrow 3-thread overlock setting with differential feed works well for georgette and chiffon edges. The differential feed should be adjusted before thread tension is changed.
Why does silk skip stitches even with a new needle?
Skipped stitches on silk are usually caused by using a ballpoint or blunt needle, a wide-slot throat plate, or insufficient presser foot support. A sharp set-cloth point needle and a single-hole plate correct most skipping.
What tension settings work best for silk?
There is no single setting, but the rule is lower than normal for both upper and bobbin tension, with the stitch meeting in the middle of the fabric and no indentation along the seam line. Always set stitch length and foot pressure before final tension adjustment.
References
[1] ISO 4915:1991, Textiles — Stitch types — Classification and terminology, International Organization for Standardization.
[2] ISO 4916:1991, Textiles — Seam types — Classification and terminology, International Organization for Standardization.
[3] ASTM D1683/D1683M-17, Standard Test Method for Failure in Sewn Seams of Woven Fabrics, ASTM International.
If you’re interested, check out these related articles:
Unique Debuts At Gtb Expo Empowering Bangladeshs Garment Industry Upgrade With Customized Automated Solutions
Unique Team Visited The Southeast Asian And South Asian Markets
Empowering Hanoi Shaping The Future Meetlin Successfully Hosts Vietnam Garment Industry 4 0 Summit
Race Against Time Travel To 8 European Countries In 20 Days