Most sewing-floor fatigue is not a stamina problem. It is a posture problem repeated for eight to ten hours at a fixed workstation. When a chair is too low, an operator raises the shoulders to reach the needle. When the table is too high, the elbows flare and the neck angles forward. Over thousands of stitches per shift, these small deviations become shoulder tension, lower-back strain, wrist complaints, slower bundle handling, and more missed defects.
The fastest corrective move is not usually a new machine. It is setting the chair, table, and pedal to the operator’s body and the operation being sewn. This guide explains the practical sequence for industrial sewing workstations, from seat height and work height to pedal angle, lighting, and multi-shift setup.
Why a Static Posture Becomes a Production Problem
Industrial sewing is constrained sitting work. The trunk is held close to the machine, the head tilts forward to see the seam, and the hands work within a narrow visual field. ISO 11226 and EN 1005-4 evaluate this kind of static working posture by looking at trunk, neck, shoulder, and upper-arm angles[1][2]. When those angles stay outside a neutral band for long periods, muscle activity remains elevated even though the task looks light.
For the factory, the result is not only discomfort. Fatigued operators slow down on positioning, lose seam accuracy on curves, and become less likely to catch early stitch defects. For the operator, the common complaints are neck and upper-back stiffness, pressure at the front of the shoulders, lower-back ache from an unsupported pelvis, and hand pain from a bent wrist on the machine bed. Many of these can be reduced with a better sitting position before investing in advanced automation.
Chair First: Seat Height, Depth, and Support
Start with the chair because every other measurement is adjusted from the seated position. The first target is seat height: thighs should be roughly horizontal, knees near 90 degrees, and both feet supported either on the floor or a footrest[3]. If the seat is too low, the hip angle closes and the pelvis rolls backward, which flattens the lumbar curve. If the seat is too high, the operator perches forward and cannot use the backrest.
Seat depth is the next check. There should be a small gap behind the knee — about two to four finger-widths — so the seat edge does not press into the sensitive area behind the joint and restrict circulation[3]. The backrest should contact the lower back and support the lumbar curve, not just the shoulder blades. For sewing, a lightly forward-tilted seat or a cushioned seat with a rounded front edge often works better than a deep, soft chair that encourages a slouched pelvis.
The chair also needs to match the machine. A swivel chair on castors lets an industrial sewing machine operator turn toward a bundle table without twisting the spine. Armrests, if fitted, should be short or adjustable enough not to collide with the table edge or force the shoulders upward.
Work Height: Let the Operation Set the Table
Work height should be set so the elbows fall near 90 degrees with the upper arms relaxed beside the trunk. For precision hand guidance and topstitch control, set the tabletop close to elbow height. For most flatbed sewing, where the operator feeds fabric with light to moderate force, ergonomic references place light assembly work about 5–10 cm below elbow height[3]. That starting point keeps the forearms from sloping upward and prevents the shoulders from hiking.
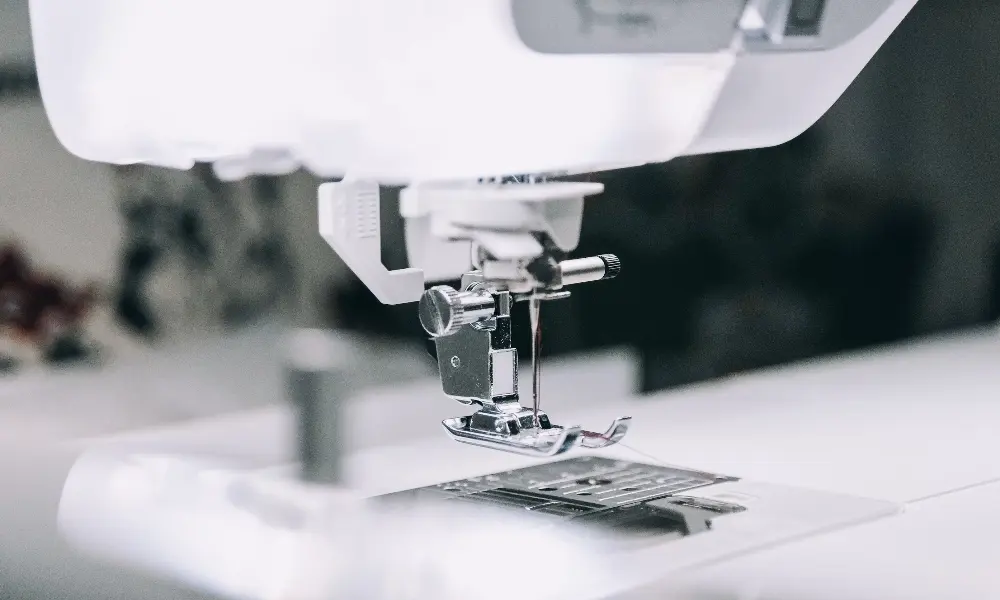
On a lockstitch machine, the critical reference is the needle-plate area rather than the table edge. If the machine head cannot be lowered, adjust the chair upward and use an angled footrest so the thighs stay supported. On cylinder-bed and postbed machines, the work height is largely fixed by the machine casting; the chair and spring-loaded footrest become the main adjustment points.
A common mistake is to set every table on the line to the same height and then hire operators around it. That locks short and tall operators into equal discomfort. Adjustable-height stands, riser blocks, or a supply of footrests in two or three heights cost far less than the rework and medical complaints generated by a poorly matched surface.
A fixed table height cannot fit every operator, and retrofitting is often part of machine selection. <Your One Stop Sewing Equipment Procurement Platform> covers how to specify equipment and workstation accessories in one procurement plan.
If you are re-laying a line and want to match table heights, chair types, and machine packages from the start, send a simple floor plan and operator height range to sales@tzpioneer.com. We can recommend a workstation package instead of leaving height adjustments to chance.
Pedal, Forearm, and Wrist Position
The foot pedal is often overlooked until ankle or calf pain appears. Position the pedal so the foot reaches it without straightening the leg or pointing the toes. The hip, knee, and ankle should stay in a comfortable line, with the heel supported if the task is short-arc pedal work[3]. On motor-driven machines, a low-effort servo pedal reduces the sustained pressure that contributes to right-leg fatigue.
At the needle, keep the wrist close to neutral: the back of the hand should continue the forearm line rather than bend sharply upward or downward. Resting the forearm on a padded edge or an adjustable table lip can reduce shoulder load, but a hard resting point on the wrist itself should be corrected. If a support pad is used, it must not push the operator into a higher shoulder position.
For overlock machine work, the hands also manage trimming and edge control. Set the chair slightly higher if needed so the operator looks down at the seam with the eyes rather than dropping the chin.
Adjusting for Different Stations, Body Sizes, and Shifts
A multi-operation line cannot be set once and forgotten. A short operator on a lockstitch workstation may need a footrest and a riser; a taller operator on the same station may need the chair lowered and the pedal moved away. Use labeled, quick-adjust chairs and mark the common settings by operator height or by station. In multi-shift production, a one-handed lever and a visible seat-height scale make repeat adjustments fast enough that operators actually perform them.
Pressing and steam stations follow the same elbow-height logic because ironing is also repetitive upper-limb work. A too-low ironing table causes forward bending; a too-high table raises the shoulders during steam passes.

The same chair-to-work-surface sequence applies at the sewing machine station and the finishing table. Where operators alternate between seated sewing and standing tasks, use anti-fatigue matting at standing stations and keep the seat close enough to return without twisting. Rotating operators between high-focus stitching and lower-repetition handling tasks also varies the postural load more effectively than a single perfect chair.
Lighting, Micro-Breaks, and Workflow That Lower Fatigue
Posture is easier to maintain when the operator does not have to lean toward the seam to see it. Position the task lamp to light the needle area without glare on the bed or reflections off chrome parts. For right-handed operators, light from the left usually reduces shadowing at the stitch point; adjust the opposite way for left-handed stations. Keep the visual distance consistent between the eyes and the needle to avoid constant refocusing.
Micro-breaks and task rotation reduce the total time spent in a fixed position[3]. A brief pause to stand, re-bundle work, or change station is often more valuable than a long rest after fatigue has already set in. Place inbound bundles and cut panels inside a comfortable reach zone so the operator does not twist to pick up every piece. Simple slide trays or angled work supports can bring the fabric closer while keeping the needle area visible.
Tuning machine speed to operator skill also matters. A slower start with fewer positioning errors usually produces more acceptable pieces per hour than a full-speed setting that tightens the shoulders on every seam. Comfort is not a subtraction from output; it is part of cycle-time consistency.
A 10-Minute Workstation Audit
| Check | What to look for | Quick correction |
|---|---|---|
| Seat height | Thighs roughly horizontal | Adjust the chair; add a footrest if needed |
| Feet | Both feet supported | Use a footrest or adjust seat height |
| Seat depth | Small gap behind the knee | Adjust the pan or replace the chair |
| Back support | Lumbar curve supported | Set backrest height and angle |
| Elbows | Upper arms relaxed beside the body | Raise or lower the chair or table |
| Wrist | Neutral hand-to-forearm line | Adjust hand support or lower work height |
| Pedal | Reached without pointed toes | Move or tilt the pedal |
| Sight line | No forward neck drop | Adjust lamp position and machine angle |
Standardizing the Line Without Standardizing Every Posture
Standardization is useful for spare parts, training, and maintenance, but it should not mean identical height for every operator. The more practical standard is a workstation package: adjustable chair, defined seat-height range, footrests in two or three heights, adjustable or shimmed table, and a documented setup card at each station. That gives the line the consistency of a standard while allowing each operator to fit the machine.
A new line setup is the cheapest time to fix this. Once the tables are welded or the stands are fixed, every adjustment becomes a retrofit. Before ordering machines, record the operator height range, the dominant fabric bundle sizes, and whether work is seated or mixed sitting and standing. That data should drive chair specs and table height options as much as the stitch class does.
Plan the Workstation, Then Build the Line
A chair and table adjustment program costs less than one serious repetitive-strain claim and usually pays for itself in better cycle time and fewer repairs. If you are setting up a new garment line or rebalancing an existing sewing floor, start with the workstation, not only the machine list.
To get a practical workstation and machine package for your operation:
- Send the machine types and approximate table heights.
- List the operator height range and shift pattern.
- Mark seated, standing, and pressing stations on a simple floor plan.
- Note the main complaint or defect point you want to reduce.
Contact UNIQUE at sales@tzpioneer.com or call +86-18069305333, and we will help you specify the seats, pedal placement, table heights, and matching sewing equipment as one solution.
FAQ
What is the correct chair height for a sewing machine operator?
Set the chair so the thighs are roughly horizontal, the knees are near 90 degrees, and both feet rest flat on the floor or a footrest. From that stable base, adjust the work height rather than forcing the operator to perch.
Should sewing worktables be set at elbow height?
For most flatbed sewing, a tabletop about 5–10 cm below elbow height is a practical starting point[3]. For precision topstitch and detail work, set the surface closer to elbow height. On machines with a fixed head height, adjust the chair and use a footrest instead.
Can one table height work for all operators?
No. A fixed height forces shorter operators to raise the shoulders and taller operators to stoop. Adjustable stands, riser blocks, and footrests are more effective and less expensive than expecting every body to fit one measurement.
Do anti-fatigue mats help seated sewing operators?
Seated operators benefit mainly from correct chair height, seat depth, and foot support. Anti-fatigue mats are more useful at standing stations such as pressing, cutting, or occasional inspection points.
How often should operators stand or change posture?
There is no single fixed number for every factory. The practical approach is to combine brief micro-breaks with task rotation so no operator remains locked in one position for long uninterrupted periods[3].
References
[1] ISO 11226:2000, Ergonomics — Evaluation of static working postures, International Organization for Standardization.
[2] EN 1005-4:2005+A1:2008, Safety of machinery — Human physical performance — Part 4: Evaluation of working postures and movements in relation to machinery, European Committee for Standardization.
[3] Canadian Centre for Occupational Health and Safety (CCOHS), Working in a Sitting Position — Overview, accessed 2026.
If you’re interested, check out these related articles:
Milin Group Taizhou Center Taizhou Supplier Appreciation Dinner
Unique And Ekinci Makina Reaffirm Partnership For Iraq Market
Joining Hands For Progress Empowering The Future Dubais Technical Team Completes Technical Exchange And Training At Nicerbt
Wu Jiling Vice Chairman Of China Sewing Machinery Association And His Delegation Visited The Leading Company For Inspection And Guidance