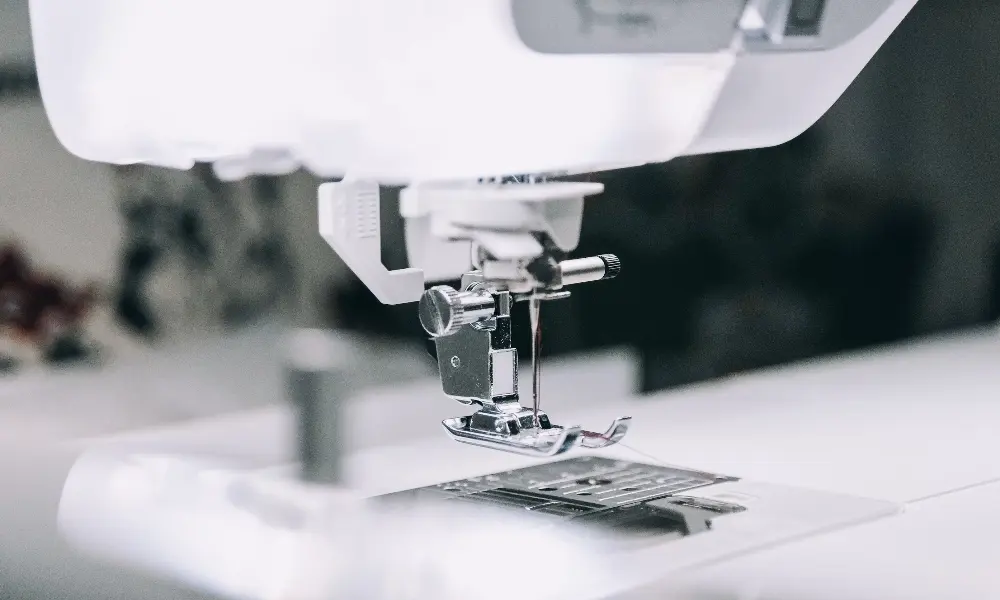
An industrial sewing machine is not one component doing all the work; it is a timed system of small parts that guide thread, move fabric, and form the stitch. When an operator, mechanic, or buyer can name the main parts, fault diagnosis becomes faster, adjustment requests become more precise, and spare-parts orders stop being guesswork. This guide groups the 20 most important parts of a modern industrial machine by function, explains what each part does, and notes the first place to look when stitch quality or machine behavior changes. Part names also matter for safety communication; ISO 10821 uses defined terms for guards, stopping devices, and work aids [1].
Why Standard Part Names Matter Before You Adjust or Replace
On a factory floor, a vague description like “the bottom part under the needle” does not tell a technician whether the problem is the bobbin case, the rotary hook, or the needle plate. Naming the part correctly shortens the repair loop and reduces the chance of changing the wrong component. The same discipline helps when buying replacements: needle system, bobbin type, and bed shape are not cosmetic details. A consistent vocabulary also improves operator training, because new sewers learn adjustments against a named reference rather than a general picture of the machine [2].
When you move from learning parts to specifying machines or replacement components, the part list becomes an ordering tool. A complete specification should name the work head, stitch type, feed system, trimmer availability, and power supply before a quote is issued.
Once the part list is fixed, procurement becomes a precision task rather than guesswork. <ワンストップの縫製機器調達プラットフォーム> covers the spare-parts and machine specification questions buyers raise before placing a mixed equipment order.
Head Area: Parts That Touch Fabric and Thread First
1. Needle. The needle pierces fabric and carries the upper thread through the material to meet the hook. Industrial needles use system codes such as DB×1 or DC×1, with size numbers matched to thread diameter and fabric weight. Point shape—sharp, ball point, or cutting—must suit the material [2].
2. Needle bar. The needle bar connects the needle to the head drive. If the bar or its bushing wears, needle deflection increases and skipped stitches appear before visible looseness is easy to feel.
3. Presser foot. The presser foot holds material during stitch formation. Foot types include standard, zipper, piping, and roller feet, and the number of available attachments changes what a machine can do without custom jigs.
4. Presser foot lifter. The lifter raises the foot for positioning or thick seams. Manual, knee-operated, and automatic lifters each suit different 製品ion speeds; incorrect height settings damage fabric and needles.
5. Needle plate. Also called the throat plate, the needle plate covers the lower mechanism and supports the fabric. Its needle hole must match the needle system and stitch width, and its engraved seam guide lines become alignment references for operators.
Stitch Formation: Parts That Lock the Thread
6. Bobbin. The bobbin supplies the lower thread. Metal bobbins, pre-wound bobbins, and bobbin tension settings all change lower thread delivery and must match the machine model.
7. Bobbin case. The bobbin case holds the bobbin and controls lower thread tension through a spring. A damaged case or a poorly wound bobbin creates looped stitches on the underside.
8. Rotary hook. On a lockstitch machine, the rotary hook catches the needle loop and passes it around the bobbin so the upper and lower threads interlock. Hook timing must be set in relation to needle height and feed motion [3].
9. Thread take-up lever. The take-up lever pulls slack out of the upper thread after the hook passes the loop. If thread is out of the take-up eye, stitch tension changes dramatically.
10. Upper tension assembly. The tension discs, spring, dial, and release mechanism control how much resistance the upper thread meets. Dirt between the discs shows up as inconsistent tension.
11. Check spring. The check spring is the small wire spring mounted on the tension assembly. It keeps light tension on the needle thread during take-up; a broken or weak spring causes irregular stitches, especially at high speed.
12. Thread guides. Thread guides direct the cone thread to the tension assembly and needle. A grooved or worn guide can cut the thread and mimic the symptoms of bad tension.
Feed and Control: Parts That Move and Regulate Fabric
13. Feed dogs. Feed dogs are the toothed bars moving below the needle plate. They use a four-motion cycle—rise, feed, drop, return—to advance fabric. Tooth height, tooth count, and timing relative to the needle determine seam accuracy.
14. Stitch length regulator. The regulator sets stitch length in millimeters or stitches per inch. Mechanical dials, push buttons, or electronic inputs all control the same feed travel; a loose regulator creates drifting stitch length.
15. Reverse or back-tack lever. This lever reverses feed direction to lock seam ends. On automatic machines, the control panel stores a set number of back-tack stitches.
16. Bobbin winder. The bobbin winder fills bobbins evenly at the machine head or at a separate station. Uneven winding changes lower-tension behavior even when all other settings are correct.
17. Handwheel. The handwheel, or balance wheel, lets an operator position the needle for threading and maintenance. On many industrial machines, pulling or pressing the wheel disengages the drive for bobbin winding.
Before changing feed dogs, motors, or trimmers on a full line, confirm that the replacement part matches the machine model and voltage. Send the model plate details, needle system, and current fault symptom to sales@tzpioneer.com or call +86-18069305333; a compatibility check before ordering avoids the most common wrong-part delays.
Drive, Power, and Working-Area Parts
18. Motor and drive. The motor drives the handwheel through a belt or a direct-drive coupling. Clutch motors remain common for light-duty tables, while servo and direct-drive motors offer controlled speed, lower idle noise, and less energy waste.
19. Thread trimmer. An automatic thread trimmer cuts both threads at the end of the seam using a fixed or moving knife. Trim timing and knife sharpness affect the next seam start; a dull trimmer leaves a tail or causes thread pull-back problems. Many high-speed 本縫いミシン models include this feature.
20. Machine lamp. The task lamp at the needle point is part of the working station, not an optional decoration. Correct lighting reduces skipped stitches caused by poor visibility and lowers operator fatigue during close-tolerance work.
Beyond the numbered parts, the oil reservoir, lubrication lines, belt cover, and stop-motion guard should also be named during routine maintenance conversations; they protect the parts above and keep adjustments accurate.
Need Help Matching the Right ミシン or Spare Parts?
If you are training new operators on part names, standardizing spare parts across a factory, or specifying a complete garment production line, we can help. Send the machine make, model, current part number, and the stitch or feeding issue to sales@tzpioneer.com or call +86-18069305333. Taizhou Unique Machine Technology Co., Ltd. supplies industrial sewing machines, replacement parts, and factory solutions from Taizhou, Zhejiang — a major sewing-equipment industrial hub — and can confirm compatibility before shipment. Browse the accessories tools catalog when you already know the part name and need a direct replacement.
Frequently Asked Questions About Sewing Machine Parts
How often should an industrial sewing machine needle be changed?
Operators should change the needle when the point feels rough, when the needle has struck a hard object, or when stitch defects appear. In high-speed work, many factories schedule a needle change after a full shift, but fabric type and needle quality set the real interval.
Why does thread bunch up under the fabric?
A bird’s nest under the fabric is usually a threading error, a missing take-up lever path, or an incorrect bobbin case tension. Check threading first, then the needle plate and hook timing before changing tension settings [3].
Do all 本縫いミシンs use the same needle system?
No. DB×1 and DC×1 systems are widely used, but the correct system depends on the machine model and feed type. Always verify the system, point, and size from the machine manual or nameplate before ordering needles.
When should feed dogs be replaced or adjusted?
Feed dogs should be inspected when stitch length drifts, fabric is scratched, or feeding becomes irregular. Worn teeth, low height in the needle plate slot, and timing errors with the needle are the first adjustments to check.
参考文献
[1] ISO 10821:2005, Industrial sewing machines — Safety requirements for sewing machines, units and systems, International Organization for Standardization, Geneva, Switzerland, 2005.
[2] H. Carr and B. Latham, The Technology of Clothing Manufacture, 4th ed. Oxford, U.K.: Blackwell Science, 2000.
[3] ASTM D6193-16, Standard Practice for Stitches and Seams, ASTM International, West Conshohocken, PA, USA, 2016.
ご興味がございましたら、次の関連記事をご覧ください。
ユニークでエキンシ・マキナ、イラク市場でのパートナーシップを再確認
中国縫製機械協会の呉吉林副会長とその代表団が検査と指導のために大手企業を訪問しました
進歩のために手を携え未来に力を与えるドバイの技術チームが Nicerbt での技術交流とトレーニングを完了
20 日間でヨーロッパ 8 か国を巡る時間との競争